

I finally got to make one of these checkbook covers that I've been wanting to try for a while now. As the title says, these are nifty little items and a good alternative to the standard plastic cover given out by the banks. These make great gifts and I've made 6 in preparation for, dare I say it, Christmas. I know, I know, it's August. What can I say! You have to start this early if you plan on making the gifts yourself.

If you're not an expert sewer (I'm certainly not) it's easier than it looks, really. Patterns for these things are all over the Internet, but I recommend checking out the Prettier Checkbook Tutorial with great pics and clear directions. Thanks Jen, very cool. I basically followed Jen's directions with a few modifications to the pattern to accommodate Canadian-style checks that open sideways, not from the bottom. I also had to enlarge the pattern slightly because the first cover I made wasn't quite wide (or long) enough for my checks.
My modifications
Step one: cutting the material
Increase the outer fabric and pocket fabric measurements from 7×8-inches (WxL) pieces to 7.5x8-inches, same for the pieces of interfacing.

From the pocket fabric, cut one 7.5×7-inch piece and one14×3.5-inch piece. The first piece is folded following Jen's tutorial and will form the top pocket (transaction register pocket). The second piece is folded in half to make a 7x3.5-inch bottom pocket for the checkbook to slide in from the left side.
 Step two: making the pockets
For the Canadian-style cover, the bottom checkbook pocket has to be made first. Follow Jen's directions for attaching the interfacing to you material. Next, sew the bottom pocket to the liner material by placing the two right sides of your material together, and sewing along what will be the top of the pocket. Make sure to leave enough room on the left to accommodate the spine of the checkbook (3/4-inch to be safe). Fold pocket over and press. Follow Jen's directions for the transaction record pocket and the remaining steps. (Note: elastic can also be used for the strips that hold the transaction record pages open.)
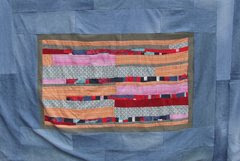
Here are some pics of the covers I made from leftovers.